
Sweet and sour chicken : 7 Secrets for Crispy Perfection
Can you recall the last time you had sweet and sour chicken that was tangy and crispy?
Finding the perfect sweet and sour chicken is a big goal for many. It’s not just about the flavors. It’s also about getting that perfect crunch that makes the dish stand out.
The secret to crispy perfection is a mix of techniques, ingredients, and knowledge. In this article, we’ll share the 7 secrets to make your sweet and sour chicken crispy and delicious.
Table of Contents
Key Takeaways
- Get the right batter to coat your chicken
- Understand the importance of double-frying
- Learn the art of balancing flavors
- Discover the secret to achieving crunchiness
- Explore the role of temperature control
- Find out how to avoid common mistakes
- Master the technique for a crispy coating
The Origins of Sweet and Sour Chicken in Chinese Cuisine
Sweet and sour chicken is a favorite in Chinese-American food. It comes from traditional Chinese cooking. Over time, it has changed due to different cultures and cooking styles.
Traditional Guangdong Roots
The dish started in Guangdong, China’s southern province. Cooks there mixed sugar, vinegar, and more to get a sweet and sour taste. This method has been perfected over centuries, making the flavor unique and tasty.
Evolution in American-Chinese Restaurants
When Chinese immigrants came to the U.S., sweet and sour chicken changed. American-Chinese restaurants added new ingredients and ways of cooking. This made a special version of the dish that’s loved in Chinese-American food.
Now, you can make homemade sweet and sour chicken in many ways. It combines old Chinese cooking with new ideas. Knowing where this dish comes from helps cooks make their own versions, just the way they like it.
| Region | Traditional Ingredients | Cooking Techniques |
|---|---|---|
| Guangdong, China | Sugar, vinegar, and various seasonings | Stir-frying and deep-frying |
| American-Chinese | Batter, cornstarch, and vegetable oil | Double-frying and sauce glazing |
What Makes the Perfect Sweet and Sour Chicken?
Finding the perfect sweet and sour chicken is all about balance. It’s about mixing flavors, textures, and looks just right. To get it just right, we need to think about a few key things.
Balancing Flavors: The Sweet and Sour Harmony
Getting the sweet and sour flavors just right is key. We mix sugar, vinegar, and sometimes tomato sauce or ketchup. This creates a sauce that’s both tangy and sweet.
Finding the right mix of sweet and sour is important. Too much of one can throw off the flavor. Experimenting with different amounts can help find the perfect balance.
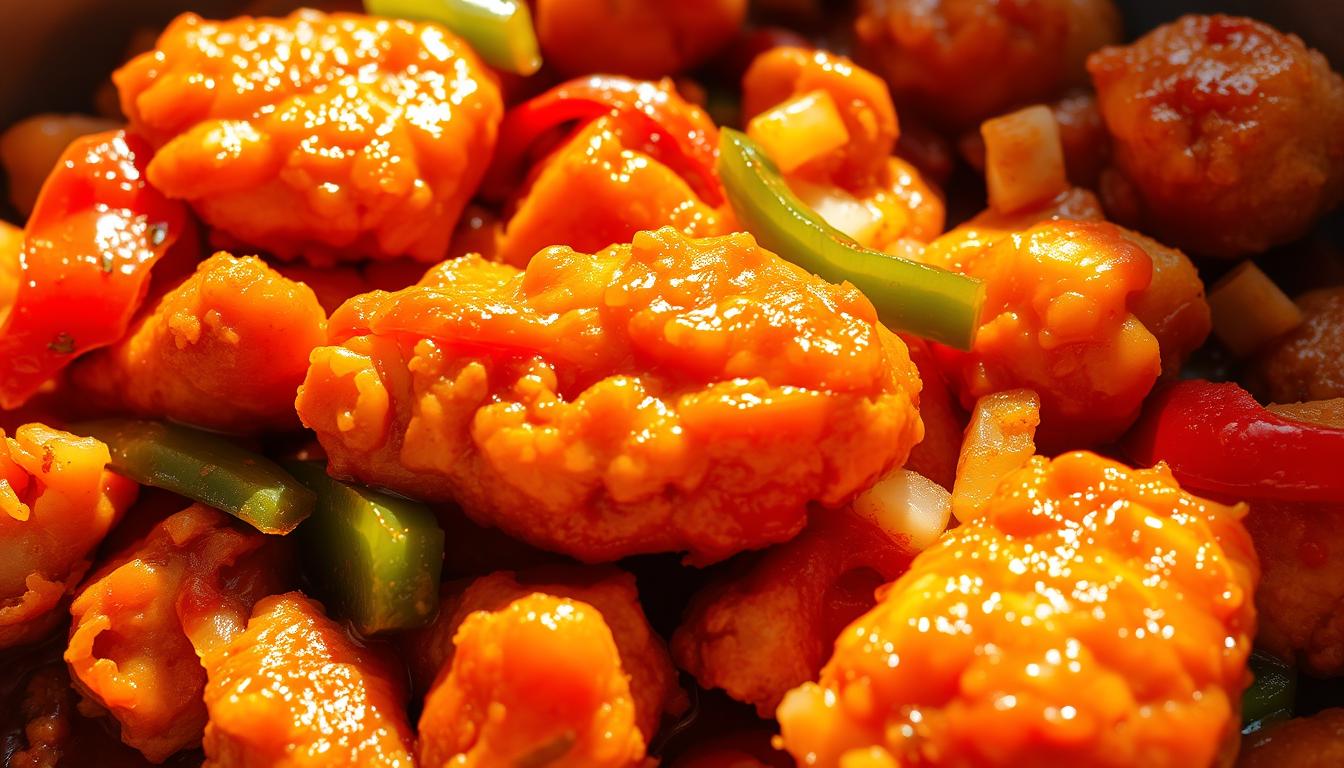
Texture Contrast: Crispy Exterior, Tender Interior
Texture is also crucial. We want a crispy outside and a juicy inside. This makes the dish feel good in your mouth.
To get this texture, we can double-dredge the chicken or use a light batter. Cornstarch or flour helps the outside get crispy. Marinating in soy sauce, garlic, and ginger keeps the inside tender and flavorful.
Color and Visual Appeal
The way the dish looks matters too. A vibrant sauce and some green onions or sesame seeds can make it look great.
To make it even more appealing, we can add colorful ingredients like bell peppers or pineapple. Fresh herbs or toasted nuts can also add texture and interest.
Essential Ingredients for Authentic Sweet and Sour Chicken
To make a tasty homemade sweet and sour chicken, pick the best ingredients. You’ll need to focus on three main areas: the right chicken cuts, the sweet and sour sauce, and pantry staples.
Selecting the Right Chicken Cuts
For the best sweet and sour chicken, use either boneless, skinless chicken breasts or thighs. Breasts are leaner, while thighs are juicier and tastier. Cut the chicken into small pieces so they cook evenly.
Key Components for the Sweet and Sour Sauce
The sweet and sour sauce is key to this dish. It includes:
- Ketchup or Tomato Sauce: This is the base flavor.
- Vinegar: It adds the sour taste. More on vinegar options later.
- Sweetener: It balances the flavor. We’ll discuss sweetener choices in detail.
Pantry Staples You’ll Need
Along with chicken and sauce ingredients, you’ll need pantry staples. These include:
- All-purpose flour or cornstarch for coating the chicken.
- Vegetable oil for frying.
- Garlic and ginger for extra flavor.
- Salt and pepper for seasoning.
Vinegar Options
The vinegar you pick affects the sauce’s taste. Here are some common ones:
| Vinegar Type | Flavor Profile |
|---|---|
| White Vinegar | Sharp, acidic taste |
| Apple Cider Vinegar | Fruity, slightly sweet |
| Rice Vinegar | Mild, slightly sweet |
Sweetener Choices
To counter the acidity, you’ll need a sweetener. You can use:
- Granulated sugar
- Brown sugar
- Honey
Choosing the right ingredients will help you make a delicious homemade sweet and sour chicken.
Kitchen Equipment You’ll Need for Success
Crispy, sweet, and sour chicken needs more than just a recipe. You’ll need the right tools to make it at home. Here’s what you’ll need to get started.
Woks vs. Regular Pans
A wok is the traditional choice for cooking sweet and sour chicken. Its shape makes stirring and tossing ingredients easy. But, if you don’t have a wok, a large skillet or frying pan works too.
Choose a pan that can handle high heat. It should also have enough room for the chicken and vegetables.
Temperature Control Tools
Temperature control is key for crispy, sweet, and sour chicken. A thermometer is essential. It helps your oil reach the perfect frying temperature (around 350°F).
This ensures a crispy outside and a juicy inside.
Helpful Utensils and Gadgets
You’ll also need a slotted spoon for removing fried chicken, tongs for handling hot food, and a whisk for the sweet and sour sauce. These tools make cooking easier and faster.
With the right kitchen equipment, you’re ready to make delicious, crispy, sweet, and sour chicken. It’s sure to impress everyone.
Secret #1: The Perfect Chicken Marinade for Maximum Flavor
To make your sweet and sour chicken better, start with a great marinade. A good marinade adds flavor and tenderizes the chicken. It’s key to making tasty, sweet, and sour chicken.
Essential Marinade Ingredients
A good marinade for sweet and sour chicken has key ingredients. These include:
- Acidic components, like vinegar or citrus juice, to tenderize the chicken
- Enzymes such as papain or bromelain are used to break down proteins
- Aromatics like garlic, ginger, and onions add depth of flavor
- Spices and seasonings to enhance the overall taste
Optimal Marinating Time
The marinating time is very important. Too little time and the chicken won’t get enough flavor. Too much time and it can become mushy. A good marinating time is 2-4 hours, but it depends on the ingredients and chicken type.
How Marination Affects Texture
Marination adds flavor and changes the chicken’s texture. The acids make the chicken tender. But, too much marinating can make it unpleasant.
The Role of Egg Whites
Egg whites in marinades help tenderize the chicken. They make the chicken more tender and smooth. The proteins in egg whites coat the chicken, helping it absorb the marinade better.
Acid-Based Tenderizing
Acidic ingredients like vinegar or citrus juice tenderize the chicken. They break down proteins, making the chicken tender and easy to chew. But it’s important to balance the acidity to avoid making the chicken too soft.
Understanding the importance of a perfect marinade is key to making great sweet and sour chicken. The right marinade adds flavor and makes the chicken tender and crispy. It’s a crucial step in preparing this classic dish.
Secret #2: The Ultimate Coating Technique for Extra Crispiness
To make your sweet and sour chicken better, learn how to coat it right. A good coating makes the chicken crispy outside and tender inside. It’s a joy to eat.
Double-Dredging Method
The double-dredging method is key for extra crispiness. You coat the chicken twice, with a break in between. The first coat sticks to the chicken, and the second adds crunch.
Start by coating the chicken lightly with flour or cornstarch. Let it rest for a few minutes. Then, coat it again. This double coat makes it crispy outside and tender inside.
Cornstarch vs. Flour: Which Works Better?
Choosing between cornstarch and flour depends on what you like and the texture you want. Cornstarch makes a lighter, crisper coating. Flour gives a denser coating. Some mix both for a perfect balance.
For crispy, sweet, and sour chicken, cornstarch is best. But, try mixing cornstarch and flour for a different feel.
Adding Texture Enhancers to Your Coating
For an even better coating, add texture enhancers like panko breadcrumbs or crushed nuts. They add a nice crunch to your chicken.
Make sure to mix the enhancers with your coating. You can also add different seasonings for more flavor.
The Importance of Drying the Chicken
Drying the chicken before coating is very important. Moisture stops the coating from sticking well, making it soggy.
Pat the chicken dry with paper towels before coating. This simple step greatly improves your chicken’s texture.
Secret #3: Oil Temperature Control for Crispy Sweet and Sour Chicken
To get the crispiest sweet and sour chicken, you must control the oil temperature. This is key for that perfect crunch. When the oil is just right, it seals the chicken’s outside, keeping juices and flavors inside.
The best frying temperature for sweet and sour chicken is between 350°F and 375°F (175°C to 190°C). At this range, the outside gets crispy fast, while the inside stays juicy and tender.
Finding the Ideal Frying Temperature
To hit the perfect frying temperature, use a thermometer. If you don’t have one, test the oil by dropping a small piece of batter into it. If it sizzles and floats up, the oil is ready.
Maintaining Consistent Heat
Keeping the heat steady is crucial for crispy, sweet, and sour chicken. Adjust the heat as needed to keep the oil in the ideal range.
Signs Your Oil Is Ready
Several signs show your oil is ready for frying. Look for a shimmering appearance, a subtle sheen, or faint smoke. You can also use the batter test or a thermometer to check the oil temperature.
Choosing the Right Oil for Frying
When picking the right oil for frying, think about its smoke point, flavor, and viscosity. Peanut oil, avocado oil, and grapeseed oil are good choices because of their high smoke points and mild flavors.
| Oil Type | Smoke Point | Flavor Profile |
|---|---|---|
| Peanut Oil | 450°F (232°C) | Mild, nutty |
| Avocado Oil | 520°F (271°C) | Mild, buttery |
| Grapeseed Oil | 420°F (220°C) | Neutral, light |
Secret #4: The Double-Fry Method for Guaranteed Crispiness
The double-fry method is a game-changer for making the best sweet and sour chicken. It ensures a crispy exterior and tender interior. This technique involves frying the chicken twice, with a resting period in between, to achieve the perfect texture.
First Fry: Cooking the Chicken Through
The first fry is crucial for cooking the chicken through. By frying the chicken at a moderate temperature, you ensure that it’s cooked evenly without burning the exterior. This step is essential for achieving tender and juicy chicken.
Resting Period: Why It Matters
After the first fry, it’s essential to let the chicken rest. This resting period allows the juices to redistribute and the coating to set, making the second fry more effective. A minimum of 30 minutes is recommended for the best results.
Second Fry: Achieving the Golden Crunch
The second fry is where the magic happens. By increasing the oil temperature, you can achieve a golden, crispy exterior. This step requires attention to detail, as the ideal frying temperature is crucial for the best results. The result is a crispy and golden exterior that complements the tender chicken.
To further enhance the crispiness, you can also experiment with different coating techniques. Try using a light dusting of cornstarch or adding texture enhancers to your coating. The key is to find the right balance between crunch and flavor.
By mastering the double-fry method, you’ll be able to create the best sweet and sour chicken. Whether you’re cooking for a crowd or just a few, this technique is sure to elevate your dish to the next level.
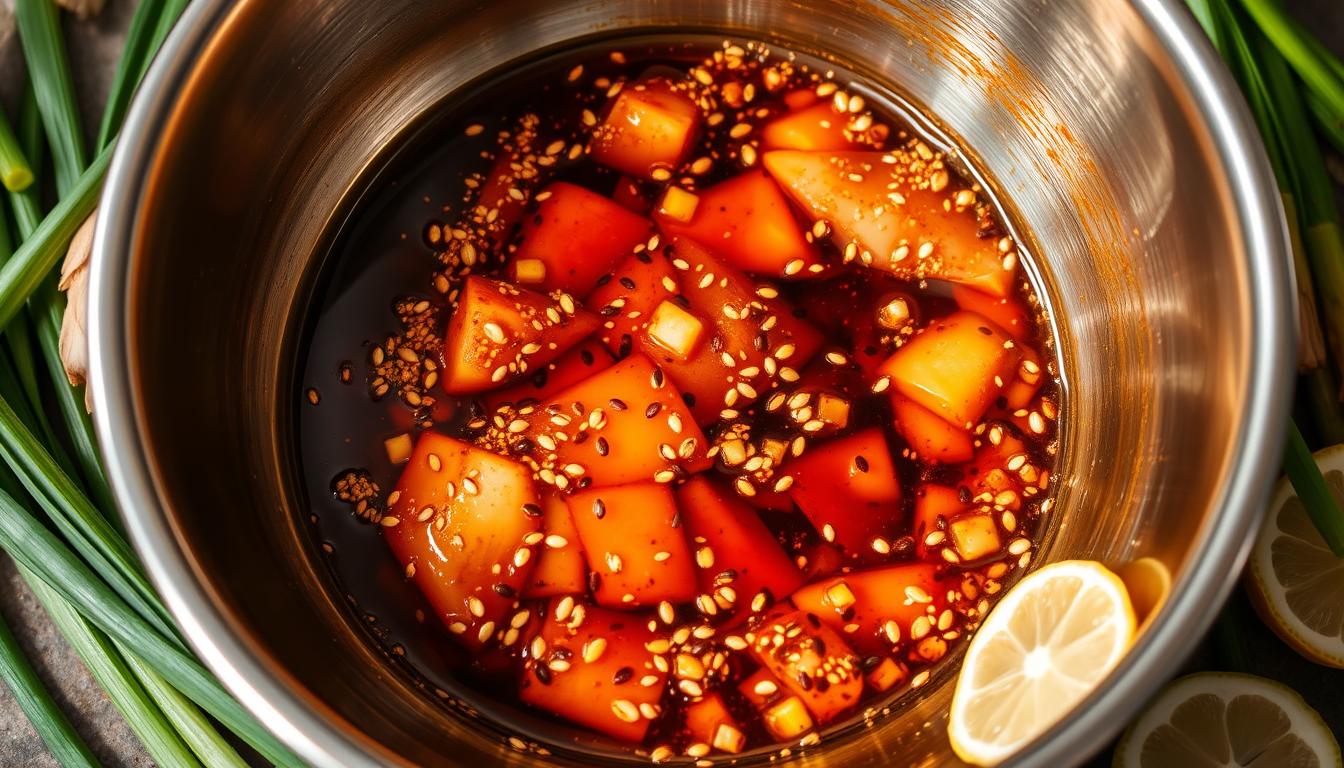
Sweet and Sour Chicken Sauce: Creating the Perfect Balance
Making the perfect sweet and sour chicken sauce is an art. It needs balance and precision. The sauce is key to the dish, making it better.
Essential Sauce Ingredients
To make a tasty, sweet and sour chicken sauce, you need a few things. You’ll need ketchup or tomato sauce, vinegar (like white vinegar or apple cider vinegar), and sugar or a sweetener. You might also add flavor enhancers like garlic, ginger, or onion for more taste.
Balancing Sweetness and Acidity
The secret to a great sweet and sour sauce is balance. Adjust the sugar and vinegar to get it right. More sugar makes it sweeter, more vinegar makes it tangier. Taste and adjust as you go.
Thickening Techniques for the Perfect Consistency
A good sweet and sour sauce is thick and syrupy. It coats the chicken well. There are two ways to get this: the cornstarch slurry method and reduction techniques.
Cornstarch Slurry Method
For the cornstarch slurry method, mix cornstarch and water until smooth. Add it to the sauce and stir well. Then, bring the sauce to a boil to thicken it.
Reduction Techniques
Another way is to reduce the sauce over high heat. This method cooks the sauce until it thickens. But be careful not to burn it, as it can get too thick.
With these techniques and the right balance, you can make a sweet and sour chicken sauce that wows. Whether you’re following an easy recipe or trying new flavors, remember to taste and adjust as you go.
Secret #5: The Proper Sauce-to-Chicken Ratio
To make your homemade sweet and sour chicken better, get the sauce-to-chicken ratio right. The mix of crispy chicken and tangy sauce is what makes it stand out.
How you mix the sauce and chicken affects the taste and texture. You can either coat the chicken with sauce or serve it on the side.
Coating vs. Serving on the Side
Coating the chicken with sauce makes every bite tasty. But you need to do it just right to keep the chicken crispy. Serving the sauce on the side lets everyone add as much as they like. This is great for groups with different tastes.
Timing the Sauce Application
When you coat the chicken, timing is everything. It’s best to sauce the chicken right before serving. This way, the crispy outside stays crunchy.
- Prepare the sauce according to your recipe.
- Have the fried chicken ready and hot.
- Toss the chicken in the sauce gently but thoroughly.
- Serve immediately to enjoy the best texture and flavor.
Preserving Crispiness When Saucing
To keep the chicken crispy, use a sauce that’s just right. It should stick to the chicken without making it soggy. Also, don’t overdo it with the sauce; a light coat is enough.
Mastering the sauce-to-chicken ratio and knowing when to sauce your homemade sweet and sour chicken will make it both tasty and pretty.
Secret #6: Vegetable Additions for Authentic Homemade Sweet and Sour Chicken
To make your sweet and sour chicken better, add traditional vegetables. They boost the dish’s nutrition, texture, and look.
Traditional Vegetable Pairings
Classic veggies include bell peppers, onions, and pineapple. Bell peppers are crunchy and sweet. Onions add a savory taste. Pineapple brings a tangy sweetness.
Carrots, snow peas, and baby corn also work well. They make the dish colorful and healthy. Choose veggies that match the sweet and sour sauce and add texture.
Proper Cutting Techniques
How you cut veggies affects the dish’s look and feel. Cutting them into small pieces helps them cook evenly and mix well with chicken.
Slice bell peppers thinly or cut onions into wedges for even cooking. Cut the pineapple into chunks for easy sauce coating.
Cooking Vegetables to the Perfect Texture
Cooking veggies right is key to keeping them crunchy and flavorful. Stir-frying or sautéing them quickly over high heat works best.
For bell peppers and onions, a bit of caramelization brings out their sweetness. For snow peas, a quick stir-fry keeps them crunchy.
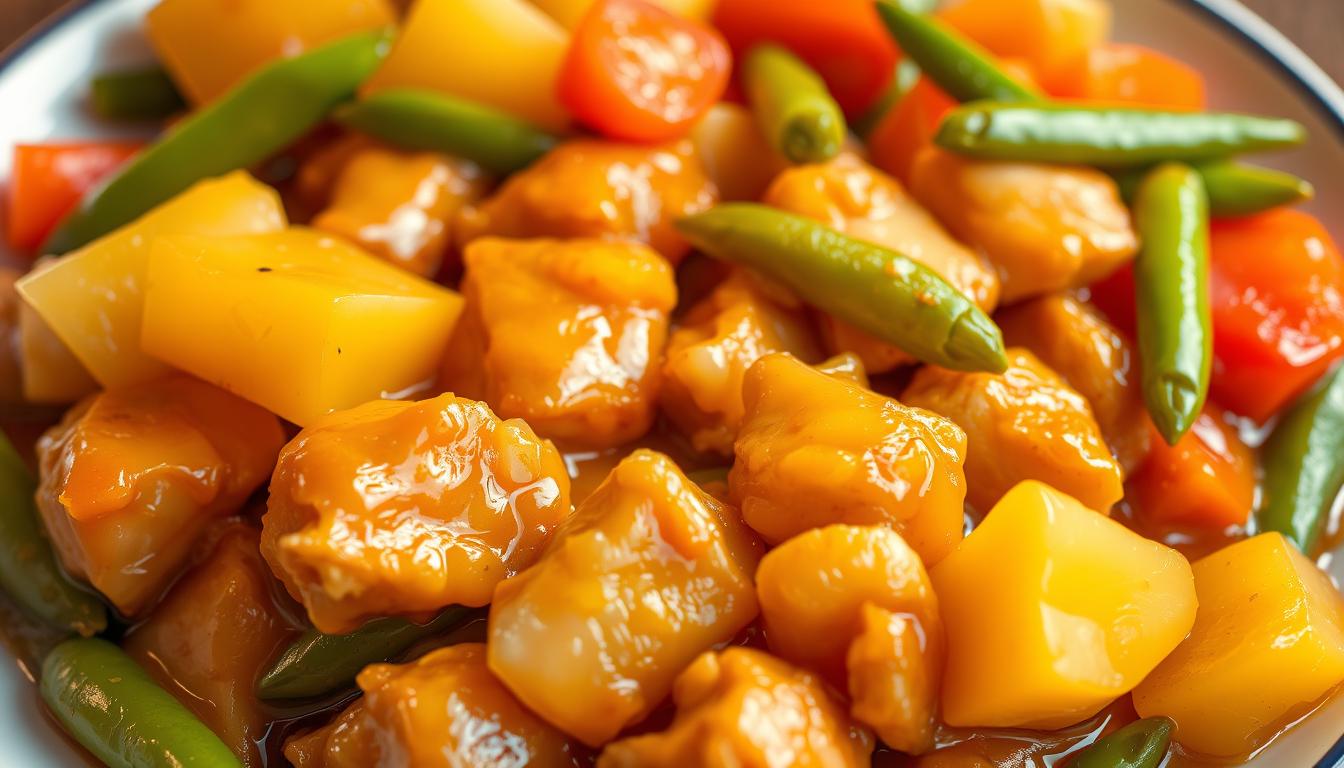
By picking the right veggies, cutting them right, and cooking them just right, you’ll make a delicious and beautiful homemade sweet and sour chicken dish.
Secret #7: Baked Sweet and Sour Chicken Alternative
The seventh secret to making amazing sweet and sour chicken is baking. Baking gives you a crispy, flavorful dish without deep-frying’s extra calories. This method cuts down on fat and adds a tender, crunchy texture.
Healthier Preparation Methods
Baking sweet and sour chicken is a healthier choice than deep-frying. It lowers the dish’s calorie count, making it less guilty. To get the best results, use the right techniques and ingredients. Marinating and a light coating help keep the chicken moist and add crunch.
Achieving Crispiness Without Deep Frying
To get crispy without deep-frying, be creative. Mixing cornstarch and spices creates a crunchy coating. Try different seasonings and marinades to boost flavor and texture. A high-protein coating also helps make the outside crispy.
Adjustments for Oven Baking
When baking sweet and sour chicken, make a few key adjustments. Adjust the sauce and cooking time. Lower temperatures and longer cooking times help get a crispy outside and a tender inside.
Temperature and Timing Guidelines
For perfect baked sweet and sour chicken, preheat to 400°F (200°C). Bake for 20-25 minutes, or until it’s cooked and crispy. Broil for 2-3 minutes more to crisp it up.
Sauce Modifications for Baking
Adjust the sauce for baking to avoid it getting too thick or caramelized. Less sugar or adding it later helps balance sweet and sour flavors. Try apple cider vinegar or balsamic vinegar for deeper sauce flavors.
Step-by-Step Recipe for the Best Sweet and Sour Chicken
Sweet and sour chicken is a favorite dish for many. This recipe helps you make it just like a restaurant in your kitchen. It’s easy to follow and makes crispy chicken with a tangy, sweet sauce.
Preparation Phase
To begin, gather the ingredients for your sweet and sour chicken. You’ll need to select the right chicken cuts, like boneless, skinless breasts or thighs. Also, prepare the marinade, coating, and sweet and sour sauce ingredients.
For the marinade, mix soy sauce, garlic, and ginger. Let the chicken marinate for at least 30 minutes. This lets the flavors soak into the meat.
Cooking Process
The cooking process involves double-dredging the chicken in cornstarch and spices. Then, deep-fry it until crispy. Keeping the oil at 350°F is key for the first and second fry.
After frying, make the sweet and sour sauce. Mix ketchup, vinegar, sugar, and sometimes pineapple juice in a saucepan. Simmer until it thickens.
Assembly and Serving
To assemble, toss the fried chicken in the sweet and sour sauce. Serve it hot, garnished with sesame seeds, green onions, or pineapple wedges. This adds color and flavor.
Garnishing Tips
For a special touch, sprinkle sesame seeds or chopped green onions on top. Serve with steamed vegetables or rice for a complete meal.
Follow this easy recipe to make a delicious Chinese dish. You’ll get crispy, flavorful chicken that everyone will love.
Serving Suggestions and Pairings for Easy Sweet and Sour Chicken Recipe
To make your meal better, try these serving ideas and pairings for your sweet and sour chicken. A great meal isn’t just the main dish. It’s also the sides that match its taste.
Traditional Side Dishes
Classic Chinese side dishes can really boost your sweet and sour chicken’s flavor. Here are some good options:
- Steamed broccoli or bok choy for a burst of green
- Stir-fried snow peas or carrots for added crunch
- Sauteed mushrooms or bell peppers for an earthy flavor
These sides not only go well with the chicken but also add variety to your meal.
Rice and Noodle Options
The right side dish can make a big difference. For homemade sweet and sour chicken, try these:
| Option | Description |
|---|---|
| Steamed Jasmine Rice | A classic pairing that lets the sweet and sour sauce stand out |
| Stir-fried Rice | Adds a savory touch and can be made with different veggies |
| Lo Mein or Chow Mein Noodles | Offers a nice texture contrast to the crispy chicken |
Beverage Pairings
For a complete meal, pick drinks that match your sweet and sour chicken sauce. Here are some ideas:
- Chinese tea or jasmine tea for a traditional choice
- Sparkling water with lemon or lime for a refreshing twist
- Beer, like Tsingtao or a light lager, for a grown-up drink
By using these serving ideas and pairings, you can make a complete and fun meal with your homemade sweet and sour chicken.
Conclusion: Mastering Your Sweet and Sour Chicken
Now you know the 7 secrets to making perfect sweet and sour chicken. It’s time to put them into practice. By balancing flavors and getting a crispy exterior, you’ll impress everyone.
The key to crispy, sweet, and sour chicken is in the details. From the perfect marinade to the double-fry method, every step is important.
As you get better at cooking, don’t be afraid to try new things. With practice, you’ll get the sweet and sour flavors just right. Plus, you’ll get a crispy exterior that everyone will love. So, start cooking and enjoy mastering your sweet and sour chicken recipe.
FAQ
What is the best type of chicken to use for sweet and sour chicken?
For sweet and sour chicken, use boneless, skinless chicken breast or thighs. Cut them into bite-sized pieces.
Can I make sweet and sour chicken without deep-frying?
Yes, you can bake sweet and sour chicken for a healthier option. Just adjust the cooking method and sauce.
What is the key to achieving a crispy exterior on sweet and sour chicken?
For a crispy exterior, use double-dredging and control the oil temperature when frying.
How do I balance the sweet and sour flavors in the sauce?
Balance the flavors by adjusting sugar and vinegar amounts. Add ketchup or tomato sauce for extra taste.
Can I make sweet and sour chicken sauce ahead of time?
Yes, make the sauce ahead and refrigerate it. Reheat before serving.
What are some traditional vegetable pairings for sweet and sour chicken?
Bell peppers, onions, and pineapple are classic pairings. You can also add carrots, broccoli, or snow peas.
How do I prevent the chicken from becoming soggy when saucing?
Sauce the chicken just before serving. Use a light hand when coating with sauce.